
We like to travel. Troy and I want so much for our children to be aware of the world and to instill in them a love of traveling and exploring it like we have.
Last year for Christmas, we gave Troy's dad a map of the world to mark all the places he has traveled to. He is the most well-traveled man we know of, so his map has pins poking out in every continent (yes, even Antarctica).
We aren't nearly as well traveled as my in-laws, but we liked the map so much that we decided to buy our own.
We put pins in all of the places that at least one of us has been. Troy's travels represent probably 90% of the marks. Growing up in Boston, it was cheaper for his family to fly to Europe than across the US, so they did a lot of foreign traveling throughout his childhood. I had a few places to contribute, and am slowing adding in my pins as well.

I know, a laminated map on the wall isn't the peak of beautiful home decor, but we just feel like it's so important for our family to know about the world. I have visions of us discussing world events and referencing the map for travel plans while we are deep in dinner conversation as our children grow up. And for that reason, I didn't want the mapped tucked away in a location we would never see. I wanted it to be prominent. So, what better place to hang it than right by our dining room table where it could be at our fingertips all the time?
It has been hanging there for almost a year, and I have already loved the conversations we have had about places in the world.
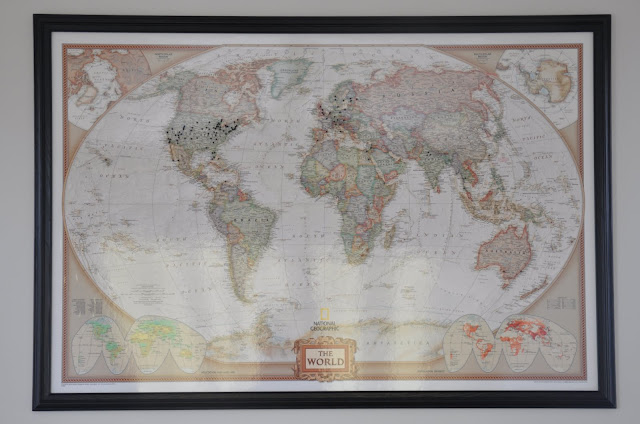
What I haven't loved is the frame. For such a large item, the frame seemed much too small. The map was so huge and odd-shaped to begin with that the price of framing was quite hefty. So, I built my own frame, adding on to the current one.
Since it has been well over a year since I've given a tutorial, I thought I'd share how I did it:

1. I bought some thick molding ($15).
2. I used a very scientific method to draw 45 degree angles (aka ruler and pencil).
3. I cut the wood using my saw. I'm sure there are much more appropriate power tools for this operation, but my trusty jig saw worked just fine.
4. Note to self: If you do this in your kitchen because it is too cold outside, you will produce a large amount of saw dust that must be swept immediately to avoid inhalation by household crawlers.

5. Does it fit? Yes. Whew. Do you ever do that?
6. I grabbed my favorite construction item; tack cloth. I love this stuff. It picks up all of the dust before sanding and painting.
7. I used liquid nails to adhere the pieces and held the frame tight with some masking tape while it dried.
8. I added putty to the corners to fill in those imperfections from sawing. Ours is bright pink and it turns white when it dries to let you know that it is time to sand.
Finally, I did a lot of sanding and added a few coats of semi-gloss black paint I had on hand.

The finished product:


Now, I want to go build frames around all of the builder grade mirrors in our house. It was easier than I thought it would be. The chunkier frame fills up our dining room wall much better, and we have the constant reminder of how much of the world we have yet to see.

looks awesome!!! i wish i had the guts to try a project like that. i would love to frame the mirrors in my house too :)
ReplyDeleteI love it!
ReplyDeleteIt looks great! I would have never thought to do that. You are so creative!
ReplyDeleteI really love the idea of a map in your home. And I can't believe you made that frame yourself! You're like that cute girl designer on Extreme Makeover Home Edition!
ReplyDeleteI love it! Nice job! I think framed maps are beautiful, we have some in our stairwell. They show them a lot in the Restoration Hardware catalog too! It is fun to show where you have been in the world. We too hope to travel the world in the near future. Great project, thanks for sharing!
ReplyDeleteI've been wanting to frame the mirrors in our house since we moved in but I don't know how - you should post it if you do it!
ReplyDelete